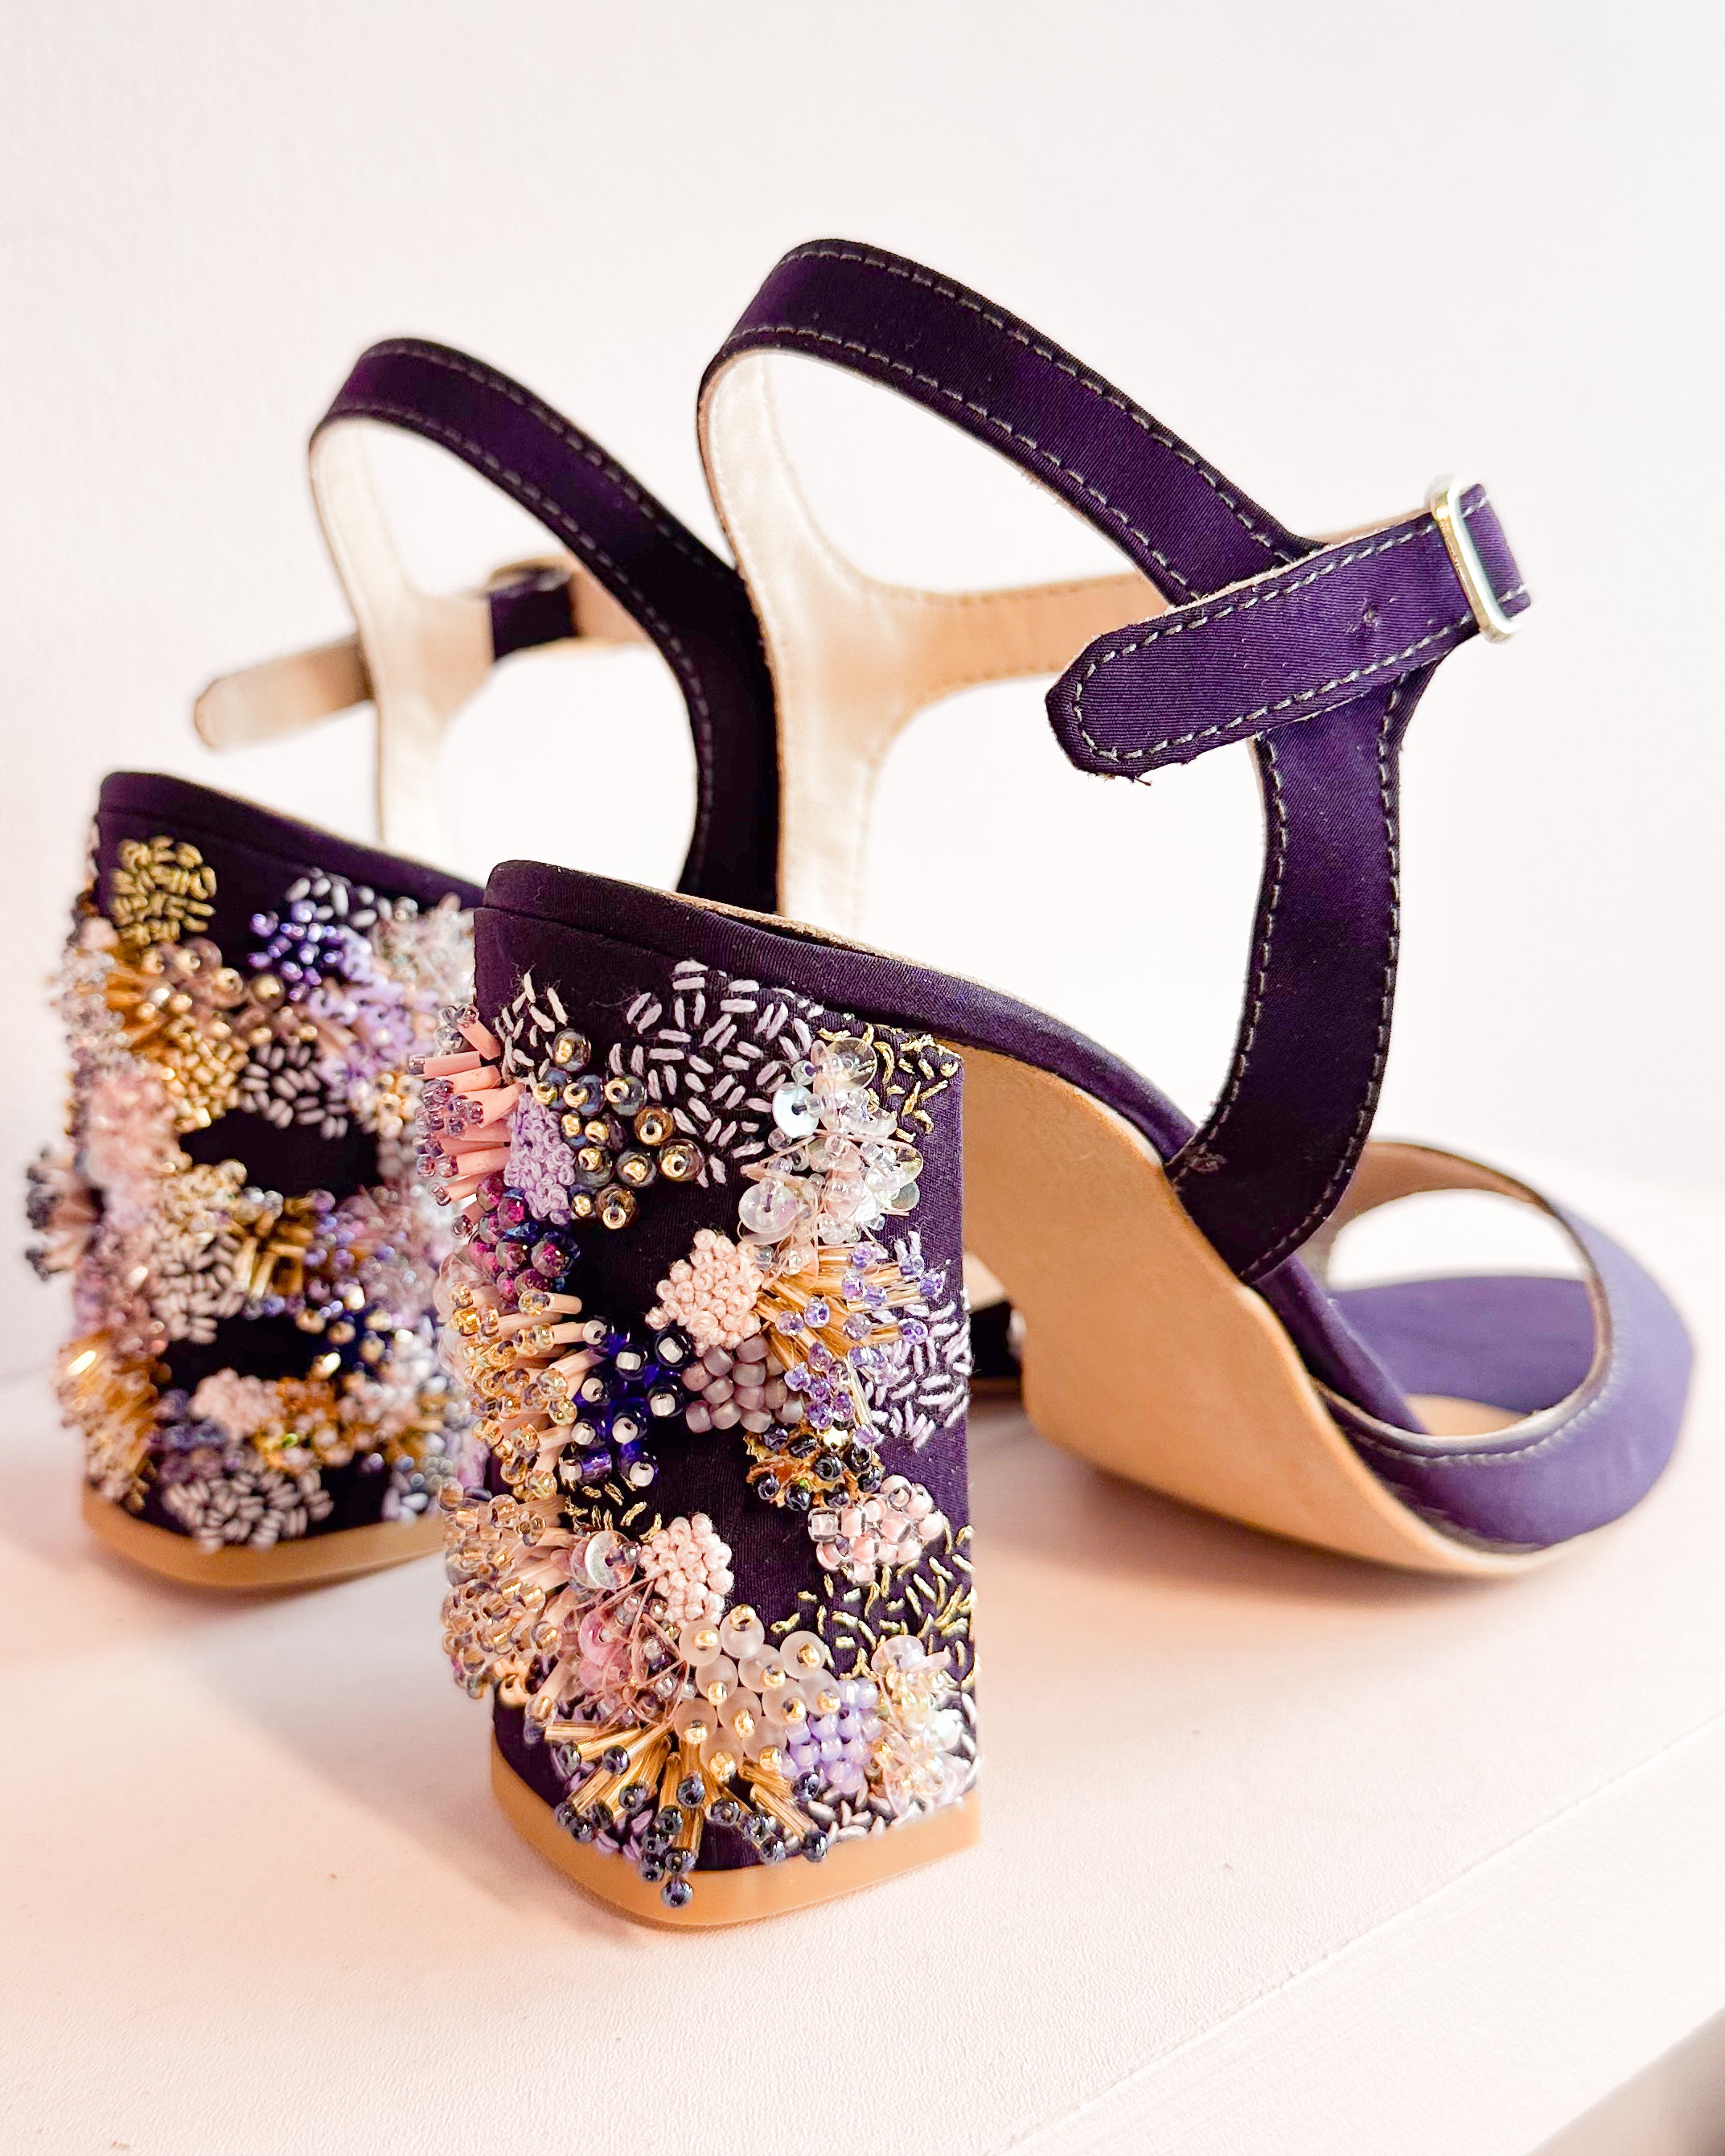
There's something inherently special about crafting your own footwear, and when it comes to sandals, adding a touch of beadwork can elevate them from ordinary to extraordinary🌟
This is exactly what we did in our latest collaboration with Imogen Melissa.
Not only did this project offer a fun and artistic endeavour, but it also resulted in a one-of-a-kind pair of sandals that you can proudly flaunt 💁♀️
In this blog, we’ll guide you through the enjoyable process of how we made these stunning sandals!

WHAT DO YOU NEED TO MAKE A PAIR OF SANDALS LIKE THESE?
Overall, these took approximately 7 hours to make, and if you are feeling inspired to make a pair for yourself, here’s a list of the all of components that we used 😉:
- ICMS ankle strap pattern
- Shanked insoles
- Foam for the insock
- Water based glue and Solvent based glue
- Buckle
- Heat gun
- Round toe high heeled lasts
- Block heel high
- Beadwork by Imogen Melissa
WHY DID WE COLLABORATE WITH IMOGEN MELISSA?
We’d been admiring Imogen’s work for quite some time, and had totally fallen in love with her beadwork style 😍
From art to jewellery Imogen’s work transforms the traditional beadwork technique into a modern craft.


Founded with the simple premise of modernising perceptions of embroidery we knew her work would provide an exciting opportunity to bring beadwork to footwear and create a dynamic 3D effect that you don’t often see on beaded shoes.
So, we invited her to collaborate with us and got to work discussing shoe styles and colours and where we should place the beadwork.

We opted for the sandal and decided that the heel would make the best feature for the beadwork as it’s one of the largest surface areas of the shoe.
Below, we share the making process and invite you to follow along 🤓
THE MAKING OF THE SANDALS
Here’s the breakdown of how we made the sandals:
1. First, Imogen Melissa embroidered a piece of fabric and sent it over to us.
2. We then used this fabric to cover the block high heels of the shoes.

3. We then traced out our patterns onto the same colour fabric used for the embroidery.
4. We also traced out our linings.
 5. We then stitched the upper and the lining together.
6. And then we covered the insoles with the purple fabric.

7. We then lasted the sandal over the last.
8. Next we punched holes for the buckle and inserted the buckle.

9. We then added some cork to fill in the base of the shoe.
10. And then we attached our sole.

11. Then we attached the heels.
12. After adding the insock, the shoes are complete!

You can watch the making process in the video below:
We are so in love with how these turned out! Actually, more like obsessed 🤪 We hope this project inspires you to think outside the box when thinking about what other craftworks you can bring into your footwear to make something truly unique ✨
If you want to find out more about Imogen Melissa you can find her on Instagram here. And her website below:
https://www.imogenmelissa.com/
Save 15% with code: ICANMAKESHOES15


